
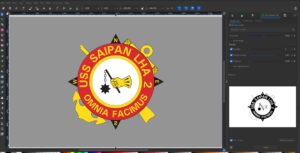
Bill purchased some clear acrylic light kits to do laser engraving on. Often the biggest hold up, for us, is the “need to do make something really spectacular and special” syndrome. Because these kits are cool the search was on for the perfect thing to engrave on one, Bill’s idea was to engrave the USS Saipan LGA 2 logo on one. Then the search became how to vector it to create the SVG. He did find a site that said that at one time they might have had one but it is no longer available and it takes a month to get a response from the creator, he didn’t want to wait a month. Especially when you know you should be able to do this yourself.
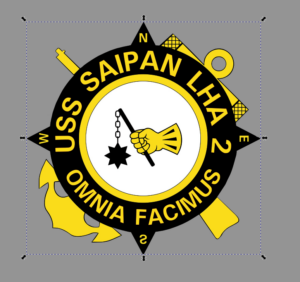
You might ask why we had to search for the logo since this is the ship Bill served on, and that is a legit question since we have many things that have this logo on them. The answer is it seemed easier to find a clear one on the internet. Bill did find one but check out this background. 
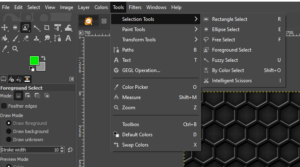
The direction marks are inside triangles but the triangles are the same color as parts of the background. In addition other colors in the background exist inside portions of the actual logo. I was finding it difficult in GIMP to use the Fuzzy Select tool, if I picked the grey color it would only select the inside of a single hexagon. If I selected the black color I got this:
Once you hit the delete key you get this:

The triangles are gone along with some of the other details.
The Foreground select tool is great when you have a lot of fine detail around the edges, like hair. I managed to get it all selected and that’s when things fell apart because the other thing you should be great at is knowing how to use the tool, I’m not.
I ended up using the Free select tool, which is probably not the easiest or best or even right tool. For me it works and once I stop looking for easier/better ways and just get down to the work it does go pretty fast. I created a duplicate layer, then added an alpha channel to it, now we can begin to create the transparent background.
I also have to use the tool bars at the top to navigate because it’s just easier for me. In addition I tackled this in chunks because I make mistakes. Like clicking in a place I didn’t want to click and then I hit esc and suddenly everything is gone and I have to start over again, this normally happens to me just when I am ready to finish it. I bump the view up to 400% so that I can clearly see my edges even the triangles around the direction indicators.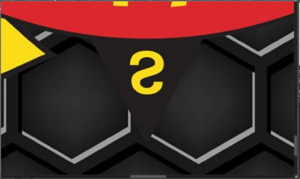
Now I can start slowly working my points around the outside edges and in this case I left a little bit of the black outline around the design. Under normal magnification it doesn’t show up. Once I had a chunk all highlighted I hit delete, saved the design, and then choose Select, None and moved to the next section. Once I had removed the background from the entire design I had this:

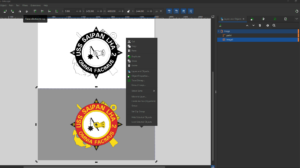
This can now be saved as a JPG and brought up in Inkscape to create the SVG I needed for the engraving software.
I use Inkscape because we don’t own the Adobe suite. I would like to try Procreate
We have an Ipen and an Ipad (thank you Comcast) and I admit this software looks fun, however, we could not find the Ipen. It was eventually found and I will neither confirm nor deny that it was found in my sewing room when the entire time I had been passive aggressively blaming Bill for having lost it.
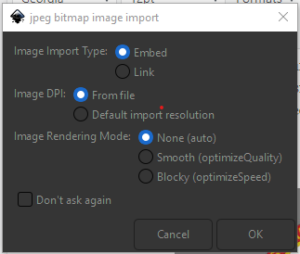
I brought the JPG up in Inkscape leaving the default choices selected when opening the file.
Once the file is open, click on it to select the image, from the top menu select Path, then select Trace Bitmap from the drop down menu. Because this design is fairly simple, with clean lines I selected to use “Brightness cutoff” for my destination mode. I left all of the default settings for threshold, speckles, smooth corners, and optimize. Looking at the preview things looked pretty clean and crisp.
Depending on your image and what you are looking for you can play around with the options here to get the best trace.
Once I was happy I hit Apply.
Now you can click on the image and drag the image and the traced objects apart.
Once you have them separated and you are happy with how things look you can now delete the image which will leave only the trace bitmap needed to create the SVG file. You can either right click on the image and select delete or you can select Object from the top menu, layers and objects from the drop down menu and then click on the “image” and select delete.
To create the SVG you can either save as or export either as a Inkscape SVG or plain SVG.
Here are some of the resources I find helpful:
Jennifer Maker (I found her when I was looking for info on printers, sublimation, inks etc – she has a ton of really good info/reviews)
Logos By Nick (This guy has some really good tutorials out there)
The Vector Lab (I really want to do more with the Procreate software and this guy is the reason)
CANVA has the ability to export an image as an SVG but you need to have the paid for version, which you can demo for 30 days. I like Canva and used it a lot in a previous job when I was editing for the website, bulletins, news letters, flyers, and more. I just don’t want to add any more monthly subscriptions right now if I don’t think that something will be used frequently enough to do everything we need.
There are so many resources out there and by no means do I think I have the best methods, right software’s, or even correct ways of doing things. This was just the journey I took to get the file that Bill wanted to complete the project he was working on. That’s probably the big take away. Don’t get discouraged and give up because you think you can’t do it as well or as easy or as professionally as someone else. Keep trying till you find a way that works for you and then go with that. If someone looks at something you have created and is more interested in being critical of your path then that’s on them. Find tutorials that help you to understand things. Make a lot of mistakes. Mostly have fun.